Wednesday, July 18, 2012

Woodworking Tolerances

I have been tied up pretty good the last few weeks coordinating a large project for my Habitat Chapter.  We are building five town home condominiums just south of Atlanta, all sponsored by a major corporate donor who sends many volunteers to the site to help with construction.  We sub-contract all the trades and use volunteer amateurs to do everything else we can.  It makes for a very interesting situation, but the enthusiasm and joy from the volunteers is what makes it really fun.


My current Habitat project.


This construction brings up two thoughts for wood workers.  The first is about tolerances.  One of the hardest lessons I had to learn as a newbie engineer many moons ago, was how many decimal places were required in a calculation.  If the first decimal place cost ten dollars to calculate, the next one was a hundred dollars and the third one a thousand dollars, how much is the answer worth to you?  When you are just starting out, that is not a simple question, but must be learned by hard experience and practice.

Sometimes I just want to work to the nearest inch, you know, sledge hammer type work.  I was showing someone today how to read a tape measure (yes, there are people on site who cannot read a tape measure).  I explained the inch, the half inch, the quarter inch, and the eighth inch marks and then told her that on this site today, you will not need to use marks smaller than the eighth inch marks. Even my experienced people on site sometimes over think things and spend too much time getting something to a 16th when a half will do.

Now, when I am making furniture, I am such a perfectionist that a 32nd or a 64th of an inch crack will haunt me every time I walk by the piece.  And that brings up the next thought.  Look over to the right of this missive and check out that square box of squiggly stuff.  Do you know what that is?  It is called a QR code, which stands for “Quick Response” code.  It’s used like the bar code (I once knew a zebra named “Bar Code”) on your groceries to transmit information.  If you have a smart phone, you can download an app (that’s an “application” for you Luddites) which will read the QR and act on the information contained in it.  In the case of the one to the upper right, it sends you to the  Highland Woodworking blog site on your smart phone so you can read about Highland any time any place.  Maybe even buy some tools.

I have embedded a QR code in this blog for you to try.  Ask your kids or grandkids to help you with it — they already know.  See if you can figure it out.  This same one hangs on my office door at Habitat and I have actually become quite well known for it.  It combines the two thoughts above as to what tolerance is required on any project and is the distillation of many years of engineering experience and practice and of working on at least 85 Habitat homes.  I think it sums it up pretty well.  See what you think and let me know.  Write your answer on the back of a twenty dollar bill and send it to me in care of Highland.

Saturday, April 28, 2012

Shaker Candle Stand

Some things don’t need fixing.  Witness “New Coke” in Atlanta about 25 years ago — somebody thought they could fix Coca-Cola.  Duh!!  How would you improve a ’57 Chevy?  Did anybody give Elvis singing lessons?  Who would have stopped Fred Astaire and Ginger Rogers and said “Wait, you’re doing that all wrong: you dance backwards and let her dance forwards, and by the way, lose the top hat and cane.”?

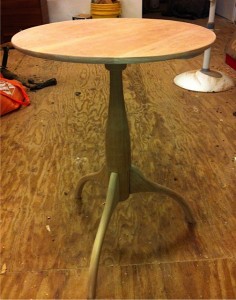
I have been working on a Shaker Candle Stand the last few days and I Googled it for some reason.  Do you know how many people think they can improve on the original?  Listen, Homer, it is done.  It is completed.  Do not sit down and say, “I think I will re-design the Shaker Candle Stand — I can do better.”


My Candle Stand


You cannot add ball and claw feet to this thing.  You cannot carve deep philosophical thoughts into the top of it.  Do not add fancy gingerbread brackets to the underside of the table.  If you simply cannot resist, then go carve clown faces in your hope chest.  The candle stand was completed 200 years ago and it is done.  I don’t have a problem with trying to improve your technique, make the dovetails better, upgrade your skew skills on the post, that sort of thing.  But nobody has improved on it in 200 years and I can tell you, Ralph, you are not going to help it.

Go watch the Roy Underhill video on making one of these babies and listen to St. Roy expound on the shape of that marvelous center post.  I love this little table, it is probably my favorite thing to try to make and I have parts of one going nearly all the time in my shop.  The dovetails are difficult for me, but I will get better.


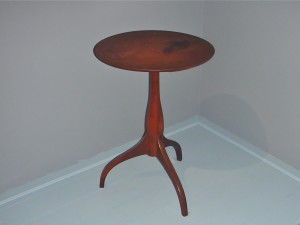
Hancock Shaker Village Table


A couple of years ago I went to New England to take a class and while there I went by the Hancock Shaker Village for a tour.  They have a beautiful Candle Stand there and it is the one I try to make each time.  If my effort does not match this beautiful example, it is a lack of skill on my part, not because I think I can improve on it.

What do you think?  Let me hear from you.

Monday, March 26, 2012

Carving a Gargoyle

Everybody needs their own gargoyle.
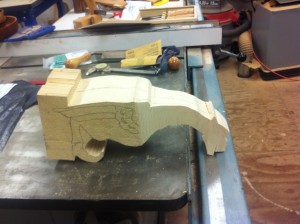
I bought some basswood at the wood store a few months ago and about two weeks ago, went to the High and got a six piece set of Flexcut carving tools.  I found a pattern I like in a book and decided to go after it.  After roughing it out on the band saw, I went after it with the carving tools.  I really like it.
Just off the Band Saw – what do you think?
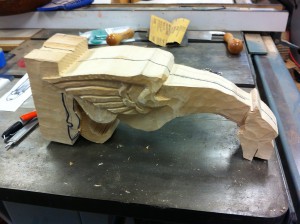
Still a ways to go, but not too bad for the first gargoyle.  Least it’s not rock.

One Side Roughed Out

Monday, March 19, 2012

Making a Spoon by Hand

  I have been thinking about dipping into spoon making (Wow, did anybody not see that one coming?) for a long time.  A couple of months ago, I finally did it and I think I like it.
Several things got me started — Peter Galbert on his website shows how he makes spoons during those long cold winter nights by the fireplace up there in far north Massachusetts.  Then he sells them to benefit a favorite charity.  Go to http://chairnotes.blogspot.com and search for spoons in the list at the bottom right or click “Spoons for Hunger” at the top right of his page.  His spoons are beautiful and painful to me as I am reminded of how far I have to go.
Another source for spoon making ideas is Robin Wood in England.   Go to http://www.robin-wood.co.uk/ and see what he has to offer.   If I lived in England and did wood working, I would call myself Robin Wood.  I love his bowls, too.  He uses a foot-powered lathe to make bowls and you saw them in that recent Robin Hood movie with Russell Crowe, the one with the medieval wooden Higgins boats the French used to invade England.  I laughed out loud.  Robin gives classes and next time you cross the pond, you can sign up.  He does beautiful work which is also painful to me.
Try Roy Underhill’s “The Woodwright’s Shop” for his current season show #3108 with Peter Follansbee on carving Swedish spoons.  The main thing I learned from this one is to use green wood (duh!).  I mean I did not get that when I started.  I was picking up old chunks of wood from around the shop and then dust was flying everywhere and I never got it done, and my admiration for spoon carving was rising all the time.  I was about to give it up as too hard and too much trouble when I watched Roy and Peter and they set me on the green wood path.
The fourth source is Drew Langsner over at Country Workshops in North Carolina.  Go to countryworkshops.org and check out his videos and maybe you can sign up for a class.
When I first started looking and learning, all the instructors used traditional tools to carve spoons.  You start out with an axe and then move to a carving knife and a curved hook knife, a spoke shave and anything else with a edge that will remove wood.  Took me about three days of effort before I discarded some of that junk.  I finally went to the band saw, a hand grinder and the spindle sander — anything to get that wood off there.  If I could make the chain saw do it, I would.

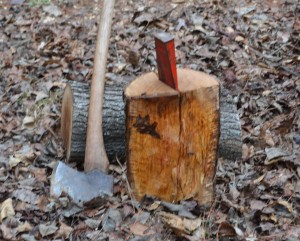
Splitting the spoon blank.
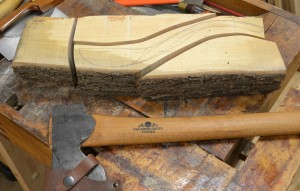
I had some green Bradford pear wood that I got when a tree blew over at the office.  I split it out to a suitable blank and sketched a shape I liked from one side and then from the top and put it on the band saw to get the basic shape.  I moved to the axe (from Highland) and a stump (from the yard) and started hacking away.  Surprising how much wood (or fingers) you can take off with an axe while still maintaining control of the work.  I found the trick to a good spoon is getting it thin enough to make it look delicate while leaving it thick enough to be strong.  I like a shape which is wide horizontally at the handle and tall vertically near the bowl.  The transition between the two is lovely when done right.

Roughed out on bandsaw
The tools I used are some I already had around the shop including the short axe, and a spoke shave.  The other odd group of tools is a set of Exacto hobby tools which are small and very sharp, and include a small spoke shave which is marvelous for final shaping, and a round head cutter sharpened on one side.  I went to Highland and bought two new tools which are really nice for the work.  One is a small carving knife which came very sharp with no need for honing.  It works like a champ.  The other is a curved hook knife which is used for hollowing out the bowl of the spoon.  I was surprised at how well that little knife worked.  You can see all the tools in the picture.
The single biggest problem is holding the work so you can carve on it.  Roy Underhill showed how you actually carve the bowl first since it is the hardest to shape.  Plus you can clamp the square handle in the bench vise so you can work the bowl.  I found there is a delicate balance between holding and carving, and eventually you end up holding the whole thing against your chest while you carve.  One of these days I will have to make a shaving horse which I think will work better without breaking the spoon.

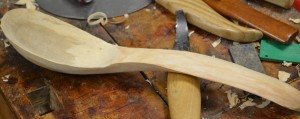
Almost ready to go.
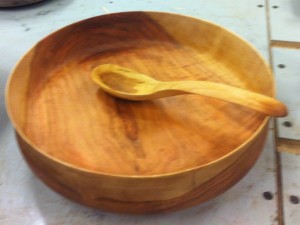
As I said, I am not proud and I will use any power tools I have to get the wood off.  I did learn to wrap the unfinished piece in kitchen plastic wrap to keep it from drying out until I get back to it the next day.  So far it takes me about four or five hours over a couple of day to get one done, but I think I will get faster.  I have done about four spoons so far and the last one was pretty good.  I had a bowl out of cherry that looked really nice and I noticed the spoon matched the bowl, even though they are different species.  It made a really nice bridal gift.

The bridal gift.
Think you might like to make a spoon one day?

Friday, February 17, 2012

Curves on a Table Saw

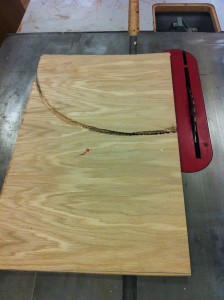
  Bet’cha can’t do this.  Not many people can cut a perfect arc on a table saw in a thin piece of plywood.  Notice how the cut is just the right depth to keep the ply together.  Notice how the cut starts in from the side perfectly tangential to the arc.  Notice how the cut continues all the way across the workpiece in a perfect arc.  Notice the small blood stain in the center of the piece.
Perfect Arc on the Table Saw
Maybe you have guessed by now this is a terrible mistake and a big screwup.  I was cutting some pieces of plywood for our annual family gingerbread house construction and I failed to pay sufficient attention near the end of the cut.  It got away from me in about one tenth of one second and the next thing I knew it was bouncing off the back wall of the shop about 15 feet behind me.  Thank goodness I was wearing a face shield and standing to the side as I always do.  The only damage, besides my ego, was a broken fingernail and a pretty good scrape to my ring finger from the flying plywood.  That thing took off like a helicopter, flew just past my head, all the way across the room and banged into the wall near the ceiling behind me.  It was brutal and scary and reminded me all over again how potentially devastating a moment of carelessness can be in the shop.
I am sure that many of you out there are looking at my saw and noting the lack of a guard and splitter at the blade.  You are right and I deserve that.  But for all you beginners out there, note this.  I am an experienced woodworker who has used a table saw for years and I know how this kind of kickback happens.  It happens because I took off the splitter behind the blade and the piece twisted and the back portion of the saw caught the wood and threw it back at me.  But you see, I was just going to use the saw for thirty seconds to make a base for a gingerbread house and it was not a real project,   and I know all about this stuff cause I write for Highland and I don’t need any advice from you.  That kind of thinking is what gets you hurt.  Leave the guard on your saw or at the very least, get an aftermarket splitter behind the blade.  And be careful out there.
By the way, the way you know you are pretty far gone is when something bad happens, all you can think is “Oh wow, that’s a great blog entry”.

Thursday, January 12, 2012

Woodworking Resolutions for the New Year

 Here are some resolutions for this woodworker for the New Year. 


1. I will find some good classes to go to. Highland offers a wonderful range of woodworking classes with the added advantage (for me) of no air travel, and no hotel bills since I can come back to my own house every night. In addition, I plan to look into the John Campbell Folk School https://www.folkschool.org/ just over the Georgia line in North Carolina. They offer a wonderful range of classes from a weekend to a full week on a wide variety of subjects from kaleidoscopes to quilting to calligraphy. I kinda like the fly rod stuff. Room and board are included in their fees and you stay in a dorm on site and eat family style in the dining room. To be fair, for lunch Highland points you to the saloon next door where you can eat family style with your class and quite often the instructor too.

2. I will clean the filters in my dust collectors. I looked up at the ambient air cleaner in the ceiling of the shop the other day and it must have a pound of dust in it. The filter is two inches thick and it costs upwards of thirty bucks when you buy a new one. Sure would hate to ruin it.

3. I am moving out all the plywood and pegboard that I have in the shop. I do not like plywood and I do not like things made with plywood. I had some plywood imported from Russia one time and it smelled like a wet dog whenever you cut it. Pegboard is a project killer for me. I am going to stick with real wood and concentrate on “fine” woodworking (whatever that is).

4. I will finish my sculptured rocker, the one on display at Highland. I want to rock in that bad boy and I want the right side to match the left side when I finish it.

5. I want to turn a hollow vessel. It is one of the many gaps in my turning skill set and I just think it is something I need to do well before I can rightfully call myself a woodturner.

6. Add the skew to that. Still working on that boy.

7. I plan on cleaning the shop very well at least one time this year. I will get down on my hands and knees with the shop vac and clean every square foot of the floor. I also think it may be time to throw away all those cut-offs I have been saving for heaven knows what. They tend to build up over the years, especially since I really hate to throw wood away.

8. Clamps are all over the floor. I have no good place to store them and it would be a real joy to have them in one place easily and quickly accessible to a project. I may do a cart or I may try to clean off a wall somewhere and build a wall rack.

9. My son laughs at me all the time for the roll top desk which has been about 85% finished for the last 15 years. Perhaps this is the year. Course he claims it is such a tradition seeing it there unfinished, he would really miss it if it got finished and moved up to the house. Oh yeah, there is a tilt back rolling desk chair which is only partially refinished. And the new mahogany writing table. Oh, and the oak barrister’s bookcase. The second cherry Shaker candle stand. The walnut school house clock. Plus about twenty bowls. Better be a long year.

10. I’m going to fix the work table behind the table saw. Right now, it is about four inches higher than the table saw, so if I want to use it as support when I push a board through the saw, it is too tall. (Really helpful if I ever have another piece of plywood in the shop.) Plus right now it has all those bowls and the clock on top of it in the way. I plan to clean it off, level it up and then mark the legs for cutting to the saw height. Same way you level a chair.

11. And last, I want to learn to make my own custom moldings. I find the subject fascinating, both for the detail involved, the lack of noise and dust, and the universality of the methods used. It appears that virtually any molding can be made entirely by hand and with a few of the right tools, it is achievable by most of we amateurs. Go look at “Big Pink” (don’t ask) on the blog http://musingsfrombigpink.blogspot.com/2011/11/result.html. Course he sells the tools also.

12. Oh yes, I want to learn the bass guitar. I find myself picking out the bass line in any song and in another life if I could choose, I would like to be able to sing bass in a Southern Gospel Quartet. Here’s what I mean: http://www.youtube.com/watch?v=LhAqojyHhc8&feature=related Whenever I find myself playing a little air guitar, it is always the bass line. I’ll never be able to sing it, maybe I can learn to play it.

Monday, December 19, 2011

Using Woodworking Skills for Habitat for Humanity

It occurs to me that many of the people who frequent this Blog would be interested in one of my favorite things, i.e. Habitat for Humanity.  Not to be bragging, but I am probably up to 75 houses that I have worked on in some fashion or other over the years.  A few more and maybe I will learn how to actually build a house.  Let me tell you about it.

The system is pretty typical around the country.  A corporate sponsor or group or individual comes forward and offers the money needed to purchase the land and the building materials.  Then the sponsor or group will collect volunteers (that’s you, Pilgrim) to come and actually do the construction work.  In my local Chapter, we look for about 30 to 35 people per day on the site, and we schedule about ten days to complete a 1400 square foot house.  The Chapter obtains the land and the building materials, the permits and licenses, and provides essential construction expertise.  The skilled trades which require licenses will be hired by the Chapter.

Once everything is in place, construction begins and that is the really fun part.  Day One and Day Two are the best.  In our Chapter, we are sorely disappointed if all the walls are not standing by the end of the first day.  Roof trusses are usually scheduled on Day Two  and the rest of the work proceeds from there.

One of the real joys of the construction time is working with the family who will live in the house.  A requirement for purchasing (that’s right — purchasing) a Habitat House is the sweat equity investment.  Before we will sell the house to a family, they must put in 250 hours (logged in and out) working on either their house or someone else’s Habitat house.  Plus they must attend a 50 hour course on financial management as taught by Dave Ramsey of radio fame.  Once they have made the hours and completed the course work and shown they can handle the payments, then we sell the house to them for the cost of materials and land.  We provide a twenty year mortgage at zero per cent interest.  At the end of twenty years, the house belongs to the family with no further obligation to Habitat.

But then, you ask, if the materials are furnished by the sponsor, and the labor is all volunteer, why is there a mortgage?  The answer is that we take the money which comes in from the mortgages, pay a minimal staff, and then use the rest as seed money to build more houses.  It is somewhat like a benevolent Ponzi scheme.  Our Chapter for instance has built about 125 houses so we have around 125 mortgage payments coming in each month.  Larger Chapters have built 1500 or more houses.
Habitat works all around the world.  In fact, as a salute to our Christian beginnings, we tithe our monetary donations.  Turns out you can build a house in Guatemala for about $3000.  As a result, Habitat International recently celebrated construction of its 500,000th home.  Corporate Donors also step up constantly.  For example, Whirlpool Corporation donates a stove and refrigerator to every single house built in America by Habitat.  When we finish a house, we call Whirlpool and they send them out.  That’s why I buy Whirlpool every chance I get.  Blessings on them and hundreds of others who do likewise.

How do you fit into this scheme?  Call your local Chapter and see what you can do.  Start by showing up on the site one day to offer your labor in construction.  Look around and see what they need.  What you will find is a bunch of good people doing something they love for the benefit of someone who will never have a  home any other way.  Match your skills to their needs and it will be a good thing for both of you.  Go do some good!!


Our latest house, sponsored and built by employees of Delta Airlines in Atlanta.